Sunday, April 29, 2012

The Tiger Who Came To Tea by Judith Kerr


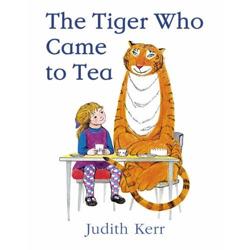
I remember reading this book over and over when I was little! I loved the fact that Sophie couldn't have a bath because the tiger had drunk all the water in the taps.

Activity: Make a tiger!

Resources: black, orange, red and white A4 paper or card, scissors, glue, ruler, eraser.

What to do: 
1) Using a pencil and ruler divide paper into 1.5 cm strips.


1.


2) Do the same with the orange paper to make 4 strips, then fold the paper lengthways and cut out the strips. They should be 1.5 cm in width and half 10.5 cm long. Do this with the white paper too.


3) Cut the white and orange strips out and start to glue them onto your black paper, using the pencil lines as guides. For the third orange strip, the one with the ears, add two circular shapes onto the end of an orange strip. To make the legs, use 4 cm long strips.

3.
4) To make the tigers jaw and mouth, Use a strip double the width of the others - (3 cm) and 14cm long. Draw and cut out the shape below in picture 4, and stick it on, above the legs.
4.

5.
5) Now for the head. With your orange paper, draw a shape like the one in Picture 6. It measures 6cm by 11cm. Cut out two 1.5cm wide strips as shown, to make the rest of each of those strips 7cm. Cut the shape out and make the sides of the strips that poke out, curved.

6.
6) Add two white stripes for the side of the face and make their side edge a little curved.

7.
 7) Add eyes and a nose and you are done! Oh and don't forget to rub out your pencil lines! :-)


I got the idea for this tiger from this Tom Eckersley print.

http://pinterest.com/pin/47076758575083851/


Tuesday, April 24, 2012

The Robot Book by Heather Brown


Activity: Recycled Robots

What to do:
1) Look through your recycling tub and choose boxes, tubes and tins. Ask an adult to make sure the tins have no sharp edges.

2)  For a nice effect paint your containers and tubes with Gesso (a surface primer for painting) and let them dry before you paint with undiluted poster or acrylic paint. This will stop the print from the packages showing through. If you have it, mix some gel medium in with your paint for a glossy finish. If not, you can paint a thin layer of PVA glue over your finished robot if you want to.


3) Paint all your robot components.

4) Once they are all dry, use glue to stick them together to make your robot. If you have a glue gun, this works well but get an adult to help as the glue could burn your fingers.

5) Use bits and bobs to decorate your robot. We used buttons and coloured matchsticks from the dollar shop.


6) For the small robots arms cut two different coloured strips of A4 paper (2 cm wide). Put the bottoms together to form a right angle. Glue them at the bottom. Then fold each piece over the top of the other until you have a concertina shape. Glue the ends. Make some pincers from aluminium foil and glue them on as hands and then glue onto the robot.

1.
2.
3.

Ta-Daa!

Other great robot books...


Monday, April 23, 2012

Autumn leaf creatures


Activity: Autumn Leaf Creatures

What to do:
Harvey and I went for a leaf walk yesterday and made some leaf creatures with the lovely things we found.


1) Take some newspaper and scrunch it up into a ball. Wrap the ball in another layer and scrunch. Repeat this until you have a head. 

2) Do the same to make a body - just use more paper.

3) Use masking tape or cellotape to stick the head to the body. 


4) Fold a piece of newspaper lengthways about again and again so that you have a long tube.


5) Wrap the tube around the back of the body at the top and stick in place so that the arms stick out.


6) Use glue and cover your creature with leaves, adding stones or dried berries for the eyes and twigs for the mouth. 

* It is much easier to use a glue gun to stick the leaves so children will need adult help. 

* Harvey and I decided to try to give our leaf creatures happier faces next time! They look a little glum.


Saturday, April 14, 2012

Babar the Elephant by Jean De Brunhoff

Make some cute Babar the Elephant finger puppets!

Resources: white card, pencil, paint, scissors


What to do:

1) Draw Babar on card or print out the template below.

2) Paint him.

3) Outline in a fine black pen and then cut out.

4) Cut out finger holes.

5) Play!

6) Use the template to make more characters.


 TIP: You could cut one hole and use your finger as Babar's trunk!


Wednesday, April 11, 2012

The Selfish Giant by Oscar Wilde


Activity: Make a beautiful garden just like the one that belonged to the Selfish Giant.

Resources: watercolour paint, watercolour paper (not essential), acrylic or poster paint, thick paintbrush, thin paintbrush, pencil, cotton buds, scissors, glue.

What you do:


1) Use watercolours with a wide brush. Use blues, pinks, yellows and greens in horizontal washes to create a beautiful background.


2) When dry, add flower detail to the foreground using cotton buds and acrylic or poster paint.


3) In pencil, draw some tree shapes on separate paper. Use my tree board on pinterest for inspiration

http://pinterest.com/hollyharveyeve/trees/

Then paint your trees in different shades of green watercolour wash.


4) When dry, add branches with acrylic or poster paint and a thin brush. You may want to add flowers to your trees using acrylic and a cotton bud, like you did for the foreground.


5) When your trees are dry cut them out and glue them onto your background.


Example 1 
Now you have a magical garden...
Example 2